Api Authentication in Laravel 10 using Sanctum

Api Authentication in Laravel 10 using Sanctum

08-Nov-2023
| |
Image Carousel

Table of Contents

S.no Contents-topics
1 Inroduction
2 Api-authentication in larvel>
3 Sanctum installation
3.1 sanctum installation
3.2 Publish sanctum provider
3.3 Sanctum migration
4 ApiResponse traits
5 Controller and route
6 Call the api

1:Introduction

While working on 3rd party application integration we are oftenly used API's to communicate with other technologies , but that doesn't means that everyone should have access to our api's so to make our api's more secure we use api-authentication , which means to restrict the usage of our api's or we can say that only allowed users can use the api's . In several technologies we use token-authentication system to authenticate the api's .

2:Api-authentication in laravel

Laravel comes with different api authentication packages like JWT , Passport and today we are discussing about a beautiful authentication package Sanctum . Sanctum is powerful as well flexible pckage of laravel which comes 
inbuilt in Laarvel-8 , if you are installing new laravel app it automatically install in your project.
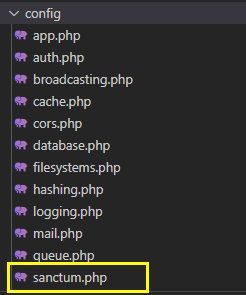
Check your config/sanctum.php if exist that means sanctum package is already installed .

in app/Models/User.php 

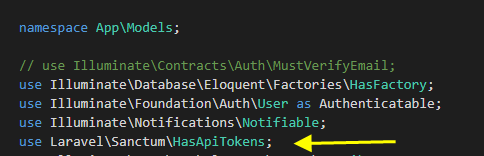
If these two images has been seen , that means sanctum is already installed but if not then follow the basic configuration for sanctum installation

3.1:Sanctum installation

Installation of sanctum is too easy just follow the below steps from 3.1 to 3.3 to successfully installed and publish sanctum
command:
 Copy

composer require laravel/sanctum

3.2:Publish sanctum provider

After that publish sanctum and migration files
command:
Copy 

php artisan vendor:publish --provider="Laravel\Sanctum\SanctumServiceProvider"

3.3:Sanctum migration

This command will create config/sanctum.php and  database/migrations/personal_access_tokens files . 
after that run migrate command so to migrate the files to the database
command:
 Copy

php artisan migrate

Now the sanctum package has been installed and publish as well and make sure in app/Models/User.php  use Laravel\Sanctum\HasApiTokens; paste this in User.php so that we iniate HasApiTokens and call the token method from User model. 
user model codeCopy

<?php
 
namespace App\Models;
 
// use Illuminate\Contracts\Auth\MustVerifyEmail;
use Illuminate\Database\Eloquent\Factories\HasFactory;
use Illuminate\Foundation\Auth\User as Authenticatable;
use Illuminate\Notifications\Notifiable;
use Laravel\Sanctum\HasApiTokens;
 
class User extends Authenticatable
{
    use HasApiTokens, HasFactory, Notifiable;
 
    /**
     * The attributes that are mass assignable.
     *
     * @var array<int, string>
     */
    protected $fillable = [
        'name',
        'email',
        'password',
    ];
 
    /**
     * The attributes that should be hidden for serialization.
     *
     * @var array<int, string>
     */
    protected $hidden = [
        'password',
        'remember_token',
    ];
 
    /**
     * The attributes that should be cast.
     *
     * @var array<string, string>
     */
    protected $casts = [
        'email_verified_at' => 'datetime',
    ];
 
 
}

4:ApiResponse traits

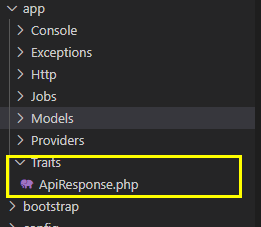
Now create a custom ApiResponse traits so that we need to call return response()->json() so will create traits manually or just using return response()->json() . I have created app/Traits//ApiResponse.php .

In our custom traits we are using success and error functions which is called inside the controller , so basically traits are peice of code which you can use in every controller ( for more about traits you can go to HOW TO MAKE TRAITS IN LARAVEL 10) Copy and paste the code of app/Traits/ApiResponse.php
code for traits: Copy

<?php
 
namespace App\Traits;
 
use Carbon\Carbon;
 
/*
|--------------------------------------------------------------------------
| Api Responser Trait
|--------------------------------------------------------------------------
|
| This trait will be used for any response we sent to clients.
|
*/
 
trait ApiResponse
{
    /**
     * Return a success JSON response.
     *
     * @param  array|string  $data
     * @param  string  $message
     * @param  int|null  $code
     * @return \Illuminate\Http\JsonResponse
     */
    protected function success($data, string $message = null, int $code = 200)
    {
        return response()->json([
            'status' => 'Success',
            'message' => $message,
            'data' => $data
        ], $code);
    }
 
    /**
     * Return an error JSON response.
     *
     * @param  string  $message
     * @param  int  $code
     * @param  array|string|null  $data
     * @return \Illuminate\Http\JsonResponse
     */
    protected function error(string $message = null, int $code, $data = null)
    {
        return response()->json([
            'status' => 'Error',
            'message' => $message,
            'data' => $data
        ], $code);
    }
 
}

5:Controller and Route 

Now in app/Http/Controllers/AuthController.php  we are using AuthController you can use any controller now just import the ApiResponse in header of this controller and intialize ApiResponse with use attribute.As shown in controller we are using register() , login() and logout() for basic api-authetication with sanctum and we are using createToken() to create token from user model
controller code:
Copy

<?php
 
namespace App\Http\Controllers;
 
use App\Models\User;
use App\Traits\ApiResponse;
use Illuminate\Http\Request;
use App\Http\Controllers\Controller;
use Illuminate\Support\Facades\Auth;
use Validator;
 
class AuthController extends Controller
{
    use ApiResponse;
 
    public function register(Request $request)
    {
        $validation = Validator::make($request->all(),[
            'name'    => 'required|string|max:255',
            'email'   => 'required|string|email|unique:users,email',
            'password'=> 'required|string|min:6'
        ]);
   
        if($validation->fails()){
            return $this->error($validation->errors()->first(),400,[]);
   
        }
 
        $user = User::create([
            'name' => $request->name,
            'password' => bcrypt($request->password),
            'email' => $request->email
        ]);
 
        return $this->success([
            'token' => $user->createToken('API Token')->plainTextToken
        ]);
    }
 
    public function login(Request $request)
    {
       
        $validation = Validator::make($request->all(),[
            'email' => 'required|string|email|',
            'password' => 'required|string|min:6'
        ]);
        if($validation->fails()){
            return $this->error($validation->errors()->first(),400,[]);
   
        }
        $data  = $request->all();
        if (!Auth::attempt($data)) {
            return $this->error('Credentials not match', 401);
        }
 
        return $this->success([
            'token' => auth()->user()->createToken('API Token')->plainTextToken
        ]);
    }
 
    public function logout()
    {
        auth()->user()->tokens()->delete();
 
        return [
            'message' => 'Tokens Revoked'
        ];
    }
}

and do this change in routes/api.php 
web.php codeCopy

<?php
 
use App\Http\Controllers\AuthController;
use App\Models\User;
use Illuminate\Http\Request;
use Illuminate\Support\Facades\Route;
 
/*
|--------------------------------------------------------------------------
| API Routes
|--------------------------------------------------------------------------
|
| Here is where you can register API routes for your application. These
| routes are loaded by the RouteServiceProvider within a group which
| is assigned the "api" middleware group. Enjoy building your API!
|
*/
 
Route::post('/auth/register', [AuthController::class, 'register']);
 
Route::post('/auth/login', [AuthController::class, 'login']);
 
Route::group(['middleware' => ['auth:sanctum']], function () {
    Route::get('/getUserDetails', function(Request $request) {
        return response()->json(['status'=>'success','data'=>Auth::User()],200);
    });
 
    Route::post('/auth/logout', [AuthController::class, 'logout']);
});

6:Call the api

Now its time for test our apis , so here i am using extention in vs code RapidApi Client , which makes easy to test api rather than to open Postman.

Hit the command http://127.0.0.1:8000/api/auth/register .

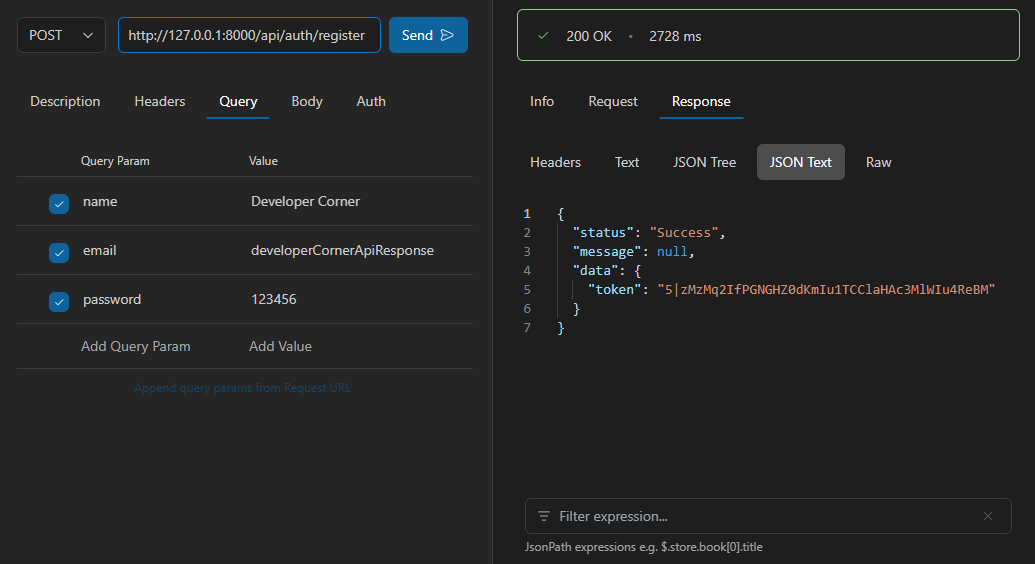
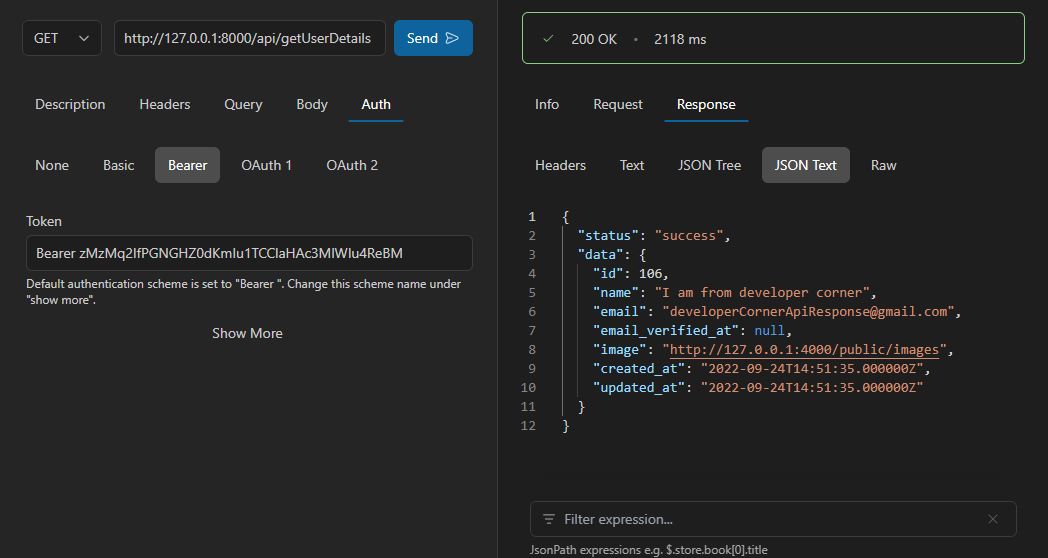
The token i received zMzMq2IfPGNGHZ0dKmIu1TCClaHAc3MlWIu4ReBM, to check the token authentication hit this command in RappidApi or postman . 

We used this token as Bearer so Auth select Bearer and write  Bearer token like this Bearer zMzMq2IfPGNGHZ0dKmIu1TCClaHAc3MlWIu4ReBM  hit http://127.0.0.1:8000/api/getUserDetails

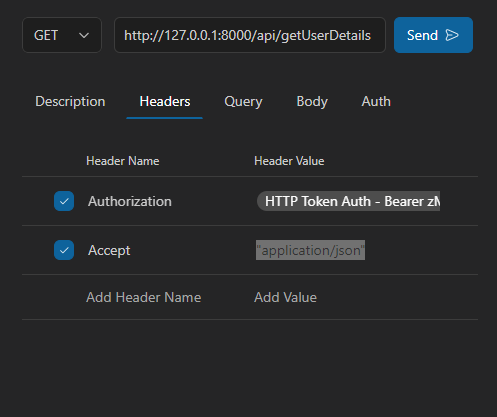
Note: if you recieved any error like Auth[login] route not defined by wrong token  simply add Accept :"application/json" in headers


Tags: api authentication in laravel 10 using santum , api authentication in laravel 10 , laravel authentication , authentication in laravel 10,laravel , php ,laravel-php , mvc laravel, advance laravel , bugs in laravel , laravel advance level,
0 Comments (Please let us know your query)
Leave Comment
Leave Comment
Articles from other Categories
Load More

Newsletter